
Mob of the Dead Easter Egg Guide — Pop Goes the Weasel, Solo-Friendly Steps (Black Ops 2 on PS5)
Full Pop Goes the Weasel easter egg walkthrough for Mob of the Dead in Black Ops 2 Zombies on PS5: every step is doable solo (plane, Hell's Retriever, blue skulls, poster, Golden Spork) — only the final bridge showdown needs 2+ players. Includes the Blundergat and Golden Spork side quests.
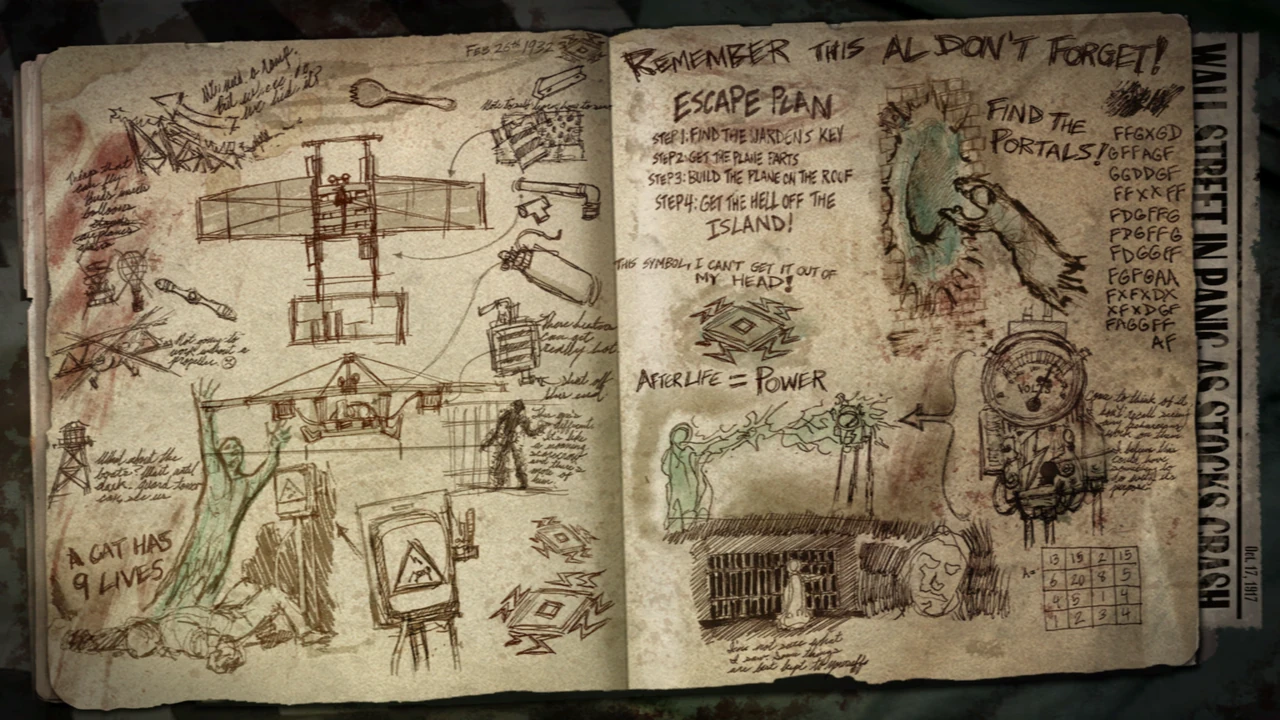
Overview
Mob of the Dead traps four Prohibition-era mobsters — Finn, Sal, Billy and Albert "Weasel" Arlington — in a purgatory version of Alcatraz. Its quest, Pop Goes the Weasel, is about discovering the truth of the cycle... and breaking it.
Can you do the Mob of the Dead easter egg solo? ⚠️ Almost. Every step can be done solo — and solo you always play as Weasel, hearing the full story. But the final showdown requires at least 2 players: it's a Weasel-vs-the-other-mobsters fight, so the trophy itself can't pop alone. Do the whole run solo for the experience, then bring one friend for the finale.
Key systems: Afterlife (your electric ghost form — solo you get limited uses, refills appear as drops), the plane, and the Hell's Retriever.
Step 1: Obtain the Hell's Retriever (✅ Solo)
Feed the three Cerberus wolf heads embedded in the walls:
- Docks area, 2. Cell block (near the Warden's office side), 3. Cafeteria area.
Kill zombies close to each head until it roars and flames out (about 6–8 kills each). When all three are fed, the Hell's Retriever — a throwable demonic tomahawk that returns to you — can be picked up from the tunnel near the spiral stairs. You need it for almost everything below.
Step 2: Build the Plane & Reach the Bridge (✅ Solo)
Collect the five plane parts and assemble "Icarus" on the roof:
- Several parts require Afterlife mode to access (hit the electric boxes/portals, travel as a spirit, and hit the switches that open part rooms).
- Classic locations: the Warden's office (afterlife door), infirmary, cell block, docks, and the generator/laundry area.
When built, board the plane and fly to the Golden Gate Bridge. Fight there as long as you like, then sit in the electric chairs to return to Alcatraz. The plane resets — later trips require refueling (gas cans around the roof/prison brought to the plane).
Step 3: The Five Blue Skulls (✅ Solo)
After visiting the bridge, five glowing blue skulls appear around the island. Throw the Hell's Retriever at each:
- In a cell in the block, 2. by a lamppost, 3. at the docks, 4. on the building across from the roof, 5. near the Juggernog area.
Weasel comments as each is destroyed — the story of the mobsters' "movie" plan unravels.
Step 4: The Poster & the Secret (✅ Solo)
In a cell near the Warden's office hangs a movie poster (green background, red lettering). Throw the tomahawk at it to tear it down. A free Blundergat appears in the Warden's office as a reward — and behind where the poster hung, a clue to the truth: the escape was Weasel's screenplay all along.
Step 5: The Numbers Panel (✅ Solo)
In Afterlife mode, find the number panel near the Warden's office/citadel and set it to the mobsters' prisoner numbers: 101 – 872 – 386 – 481. Audio cues confirm the correct entries, and more of the cycle's story unlocks.
Side Quest: The Golden Spork (✅ Solo, Optional but Worth It)
The best melee weapon in BO2 (one-hit kill into the 30s):
- After the poster step, go into Afterlife to reveal the spoon behind the poster location.
- From the cafeteria, look through the window and throw the tomahawk at the giant spoon — it relocates to the shower area as a silverware icon.
- Kill zombies with the Acid Gat near the bathtub in the infirmary until the tub fills with blood, then throw the tomahawk at the tub to receive the Golden Spork.
(You'll need the Acid Gat: build the Acid Gat Kit — parts in the Warden's office, cell block and docks — and combine it with the Blundergat at a workbench.)
Final Step: The Showdown (❌ Needs 2+ Players)
When all steps are done, refuel the plane and fly to the bridge one final time — all players must go, and it should be done deliberately (the fight starts immediately).
On the bridge, the truth plays out: Weasel against the other three mobsters. Zombies ignore Weasel and swarm the others; the mobsters must kill Weasel to continue the cycle, or Weasel must kill them all to break it — the canon ending. Weasel gets damage resistance to offset the numbers. Either outcome ends the game and pops "Pop Goes the Weasel" for everyone.
Solo note: alone you're always Weasel — with no other mobsters to fight, the final confrontation can't trigger. Everything up to this point, including the Golden Spork and Blundergat, is fully solo.
Musical Easter Egg — "Where Are We Going" (✅ Solo)
Interact with the three hidden bottles around the prison (cafeteria, Warden's office area, docks). All three trigger Where Are We Going — performed by Malukah with Kevin Sherwood.
FAQ
Can you do Pop Goes the Weasel solo? Every step yes, but the trophy needs at least 2 players for the Weasel-vs-mobsters bridge fight. Solo players always spawn as Weasel.
Which ending is canon? Breaking the cycle — Weasel killing the other three. It's the ending that feeds into the wider Aether story (and Blood of the Dead later).
Do I need the Golden Spork for the easter egg? No, it's optional — but you'll be on the map for hours anyway, and it trivializes mid rounds.
How does Afterlife work solo? You have limited Afterlife uses shown by the counter; zombies drop refills, and going down in Afterlife ends the run — manage them like lives.
Tips
- Feed the wolf heads while opening the map — it costs nothing extra.
- Never fly to the bridge with low Afterlife stock — the return chairs cost nothing but the fight back on the island can.
- Electric Cherry + Blundergat is the best solo insurance combo on the map.
- Brutus (the warden boss) spawns when you build/buy key items — keep 2000 points spare to re-open anything he locks.