
BO7 Zombies: Kowakujō Easter Egg Guide
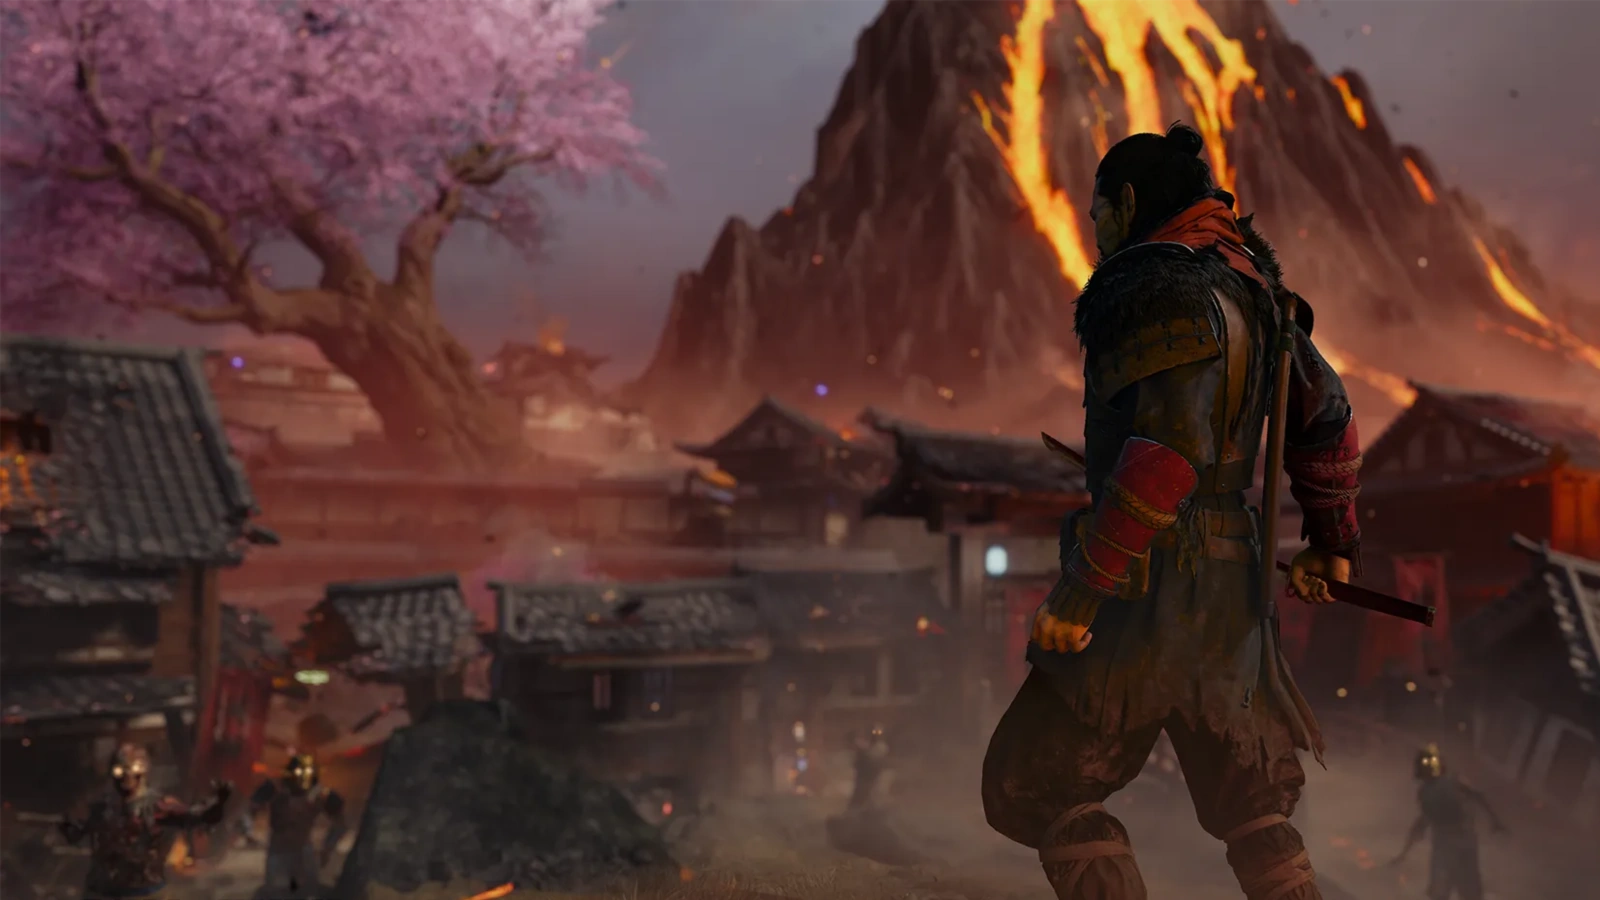
Kowakujō is the round-based Zombies map for Black Ops 7 Season 4 Reloaded, live since June 25, 2026. Set in Takeo Masaki's ancestral castle on an active volcano in the Dark Aether. Full main-quest walkthrough — Wards and the Oni, the complete Nekomancer Wonder Weapon build, the 5 evidence sets that solve Takeo's father's murder case (Suspect, Accomplice, Poison, Location, Motive), the murder-board solve, and the Oni mini-boss into the Nyxara capture-the-flag boss fight and ending. Plus side Easter eggs: the free Ray Gun obstacle course, the Takeo side quest, the carrot hunt, the Evencry secret song, perks and rewards.
Kowakujō Is Solved — Full Main Quest Walkthrough
Kowakujō dropped on June 25, 2026 with the Season 4 Reloaded update, and the main quest is solved end to end — from the opening Wards all the way to the Nyxara boss fight and ending. The whole back half of the quest is a murder investigation: you collect 5 sets of evidence to solve who killed Takeo's father, reveal a painting for each set, then solve the murder board to open the boss fight. Everything below is documented from my own completed run.
Full Easter Egg Guide (Video)
My complete step-by-step video walkthrough for the entire Kowakujō main quest, boss fight included:
A Tribute to Tom Kane
This map carries real weight. Tom Kane, the original voice of Takeo Masaki from World at War through Black Ops 4, passed away on May 18, 2026 after a stroke that had already kept him from reprising the role in BO7. The intro cinematic for Kowakujō is a direct tribute to Tom Kane. If you grew up with Ultimis and Primis Takeo, watch it through.
What is Kowakujō?
Kowakujō is the round-based Zombies map for BO7 Season 4 Reloaded. The setting is Takeo Masaki's ancestral castle, perched on an active volcano and pulled into the Dark Aether — a feudal Japanese fortress with lava rivers running through it as environmental hazards. The whole map is built around Takeo and his family's legacy, rebuilt and twisted by the Dark Aether.
Story-wise it picks up after Totenreich. The crew's goals are to free the last Shadowsmith, restore the souls of Takeo & Carver, claim the World Seed, and defeat Nyxara — and to clear Takeo's name by solving his father's murder.
Confirmed Mechanics & Enemies
- Special enemy: the Oni — shoot it in the head to knock off its mask, after which it takes far more damage. The first Oni you kill drops the very first piece of evidence (the Motive evidence).
- Psych Grenade — tactical equipment that creates a cloud of hallucinogenic gas, disorienting enemies.
- Lava hazards — used both as instant-kill hazards and as quest mechanics (the cat cage, the cooled-lava statue, and more).
- World Seed — sits next to Pack-a-Punch in Shogun's Sanctum and is central to the main quest.
- Final boss: Nyxara (Empress Nyxara) — the entity that narrates the intro is the final boss; the fight is a capture-the-flag/zone battle (see below).
- Power-Up Statues — 7 shootable statues drop their matching Power-Up; 2 more (Fire Sale, Random Perk) appear only after the first 7 are activated.
- Music Easter Egg — the secret song is "Evencry" by Kevin Sherwood, Malukah & Cole Rolland, triggered by finding three Mr. Peeks headphones: at the Stables, the Kitchen, and the Onsen Baths.
Main Quest — Opening Steps
- Conquer two flags. Complete the starting objectives: capture the two flags the game marks. This opens a new path leading toward the World Seed. Open the locked door and follow the path.
- Kill the Oni at the door. Before you can reach the seed, an Oni spawns in front of the door. Shoot it in the head to knock its mask off, then finish it — it drops the Motive evidence (your first evidence piece) and lets you open the door.
- Power the World Seed & open Pack-a-Punch. Approach the World Seed; lure zombies near it until they glow purple, then kill them until the seed is powered and Pack-a-Punch unlocks in Shogun's Sanctum.
Wonder Weapon: The Nekomancer (Full Build)
The Nekomancer is Kowakujō's Wonder Weapon — a supernatural cat companion with Spirit Bolt, Hairball, and Neko Punch.
Step 1 — Collect the three parts
Each part has three possible spawns (it rotates per game):
- Cat figure (Neco) — two spawns in the Kitchen, one at the Gatehouse.
- Bell — three locations, one of which is the Stables.
- Kakuri doll (the long statue) — at Takeo's mansion (Tenshu), three spots around the house.
Step 2 — Build the Maneki-Neko
- Take all three parts to the crafting workbench at the top of Takeo's mansion and build the Maneki-Neko.
Step 3 — Free the cat
- Drop the cage. With PhD Flopper equipped, go to the marked spot at the Tenshu Entrance and dolphin-dive (dive to prone) to make the suspended cage fall. Pick it up.
- Melt the cage. Carry it to the nearest pool of lava and drop the cat in.
- Follow the paw prints. Glowing paw prints appear at the main entrances of the Stables, Kitchen, and Flower Garden. Shoot just one zombie per set of prints to reveal it; repeat until a full circle of paw prints forms on the ground.
- Throw the Maneki-Neko into the middle of the circle — an Abomination spawns. Kill it to set the cat free.
- Sneak up on the cat. It reappears sleeping at one of three spots. Sneak up and grab it without being spotted — Death Perception is highly recommended because it highlights the creaky floorboards so you can avoid them.
- Power it at the World Seed. Take the cat to the World Seed; it jumps on and gets trapped, and the seed starts pulsing and damaging you. Melee the seed until it drops the cat, then pick it up — you now have the Nekomancer. (Pack-a-Punched, it becomes the Tsunderera-Hime.)
The Murder Case — 5 Evidence Sets
The rest of the quest is solving the murder of Takeo's father. You collect 5 sets of evidence; each completed set placed on the shelf in the Evidence (Meditation) Room reveals a painting on the wall.
Set 1 — Suspect Evidence
- Light the 11 lanterns. Use the Nekomancer to shoot and light all 11 lanterns around the map. It's a timed chain — don't miss a shot and don't take too long, or it fails and you must wait for the next round to retry. Use an optimized pet build to be fast.
All 11 lantern locations:
- Tenshu — near the Bath entrance
- Central Courtyard — left side of the tree
- Central Courtyard — near the Kitchen entrance
- Kitchen — near the stairs
- Flower Garden — near the Gobblegum machine
- Gatehouse — near Speed Cola
- Outer Ward — near the Mystery Box spawn
- Staging Area — near the hillside up to Central Courtyard
- Stables — near the Gobblegum machine
- Training Area — out of bounds near Melee Macchiato
- Tea Garden — near the Mystery Box spawn
- War Room ghost. Go back to the castle — a glowing ghost line is on the ground. Interact with it for a cinematic (Takeo's father dead on the ground; the crew suspects Takeo).
- Grab the Kitsune mask. Go to the roof and take the Ninja Kite, glide to the right of the tree, and spam interact just before the tree to pull the Kitsune (fox) mask off the roof.
- Mask Wall (Simon Says). Back in the mansion there's a wall of masks with one missing at the center. Place the Kitsune mask, interact, and play the lockdown minigame: the masks glow in an order, then kill the zombies wearing masks in that exact order. Do it three times (each round adds one mask). Clear the normal zombies first and keep a distraction handy — failing means waiting a round. On success the mask glows blue and a ghost appears; take the mask.
- Chase the mask (3 drops). The mask flies to three spots — shoot it each time to send it onward and drop a piece of evidence:
- First — a nearby room, mask on the left of the stairs.
- Second — on the roof.
- Third — just outside a nearby window (top-left). After the last shot the mask lands in the World Seed.
- Place the set. Take the three pieces to the Evidence Room shelf — the Akitsune (fox) portrait appears. Set 1 done.
Key Items — Grab These Before Continuing
You can't progress the next sets without these:
- Paper note — at the bottom of a shelf on the left where you killed the first Oni. (This is the death-cause/timing note used in the final solve.)
- Ceramic shard — same spot, a little to the right.
- Empty pouch — on top of a wooden plank in the room with the crafting table; shoot it down with the Nekomancer alt-fire or an explosive.
- Volcanic ash — fill the pouch by standing on/near an active fissure for ~30–60 seconds (bring Wisp Tea or a heal so the heat doesn't down you).
- Monkshood bud — on the left of the bridge at the Flower Garden.
- Coin purse — get the Maneki-Neko again, find the Mystery Box spot with a Japanese gold tag (use a Fire Sale to move the box there fast), throw the Maneki-Neko in front of the box and spin it → the box gives the Coin Purse.
- Two-ghost cinematic — go to spawn near the inducer; once you have the above, birds circle and land there. Interact to trigger a cinematic with two ghosts, which unlocks the next set of steps.
Set 2 — Accomplice Evidence
- Merchant. In the Kitchen, knife the tomatoes on top of the shelf so one drops. Flip it so a zombie picks it up, lead that zombie to the window of the building, and kill it there — the Merchant spawns. Kill him fast for a piece of evidence plus another paper clue.
- Gardener. Fill a bucket with water (don't run or jump or you spill it) and water the three plants at the Flower Garden (two on the sides, one opposite — refill as needed). The Gardener spawns, made immune by two glowing side-plants — shoot both plants to drop his immunity, then kill him for another clue + evidence.
- Bomb-thrower. Get three Decoys (Mule Kick + the augment, a teammate, or an Ammo Cache to recycle them) and throw one at each window of the building. The windows open and a zombie throws bombs — catch and throw them back until he dies, dropping the last clue + evidence.
- Place the set in the Evidence Room — the second painting appears.
Set 3 — Poison Evidence
- Plum Pit. In the Kitchen, knife the basket of green fruit on the shelf so it drops, then jump on it three times to reveal the Plum Pit.
- Monkshood Flower. At the castle entrance, place the monkshood bud into the vase. Knife a living Sakura tree to get the buff, run back, and run in circles around the flower pot until it glows pink — then collect the flower.
- Scroll puzzle (key item). Back in the castle, find the set of scrolls; melee them in so only the center one sticks out. It's a quick puzzle — solving it drops the last key item (the bowl).
- Pufferfish. Grab a weapon with Brain Rot from the Arsenal. In the Kitchen, interact with the bowl and fill it by killing zombies with Brain Rot. When it glows blue, interact — a blue ghost appears; turn around to pick up the Pufferfish.
- Place the set — the third painting appears.
Set 4 — Location Evidence
- Repair the bowl (kintsugi). Interact with the painting you just unlocked to get another ceramic shard, then take it to the workbench and repair the bowl. Flip it and interact for a blue-ghost cinematic.
- Place the bowl in 3 locations — order matters (remember which item you pick up at which spot):
- Castle — set the bowl down; 10 zombies arrive, defend it. Note the painting nearby.
- Garden — same defense.
- War Room corner — this time a distinguished "woofing" dog appears; chase and kill it for the final piece.
- Place the set — the fourth painting appears.
Extra clue (do anytime): at the Flower Garden, activate the traps and rack up kills; a ghost guard spawns at the back. Interact for another clue — in my run he said he saw a noble person (yours may differ), which tells you which Accomplice item is correct in the final solve.
Set 5 — Motive Evidence
- You already have the Oni's evidence from the opening.
- Molotov statue. At the Stables, when the lava has solidified, throw a Molotov at the marked spot for another evidence piece (grabbable early).
- Clock & flags. In the castle rooms, a clock appears. Interact (it pushes you back), interact again, and it gives you four numbers — note them. Advance the round to trigger a defense round and survive it. Afterward, numbered flags spawn, and four wall numbers appear around the map (mid-map, Stables, Wisp Tea, spawn). Place the flags to match the clock's numbers at the right wall spots (numbers/flags randomize each game; combine two flags in one spot for larger numbers). Return to the clock and interact for the final evidence.
- Place the set — the fifth and last painting appears.
Solving the Murder Case
With all five paintings revealed, solve the board. The key clues are the cause of death and the poison-timing note (the Known Toxins paper). Place the correct evidence under each painting:
| Toxin | Symptoms | Onset |
|---|---|---|
| Pufferfish | Paralysis, Emesis | Within 1 hour |
| Plum Pits | Cardiac Failure, Emesis | Within 2 hours |
| Wakeghoul Flower | Paralysis | Within 1 hour |
- Slot 1 — always the Comb.
- Slot 2 — the Accomplice item that matches what the ghost guard told you (e.g. the noble set if he saw a noble).
- Slot 3 — the poison that matches the note's symptoms (e.g. Pufferfish if the note mentions emesis).
- Slot 4 — the Location item whose painting matches the picture you noted during the bowl step (e.g. the item the dog dropped at the War Room).
- Slot 5 — always the Medallion.
- Set the clock to the hour of death. Read the hour of death (e.g. the Ox) and subtract the poison's onset: if the note says 3 hours, set the clock 3 hours before the Ox. Reference: 1 hour = Rat, 2 = Pig, 3 = Dog (counting back).
Then interact with the two incense burners on the sides. Wrong → an enemy spawns; right → an orb of light appears. Interact and chase the orb to the World Seed to be teleported into the fight.
Mini-Boss → Nyxara Boss Fight
Mini-boss (Oni). You're teleported to a fight against an Oni. Damage it until it transforms into a flying mask, then shoot down the correct mask to make it reappear, and kill it. You're teleported out and a Nyxara cinematic plays; when she flies off, a secret kite unlocks to reach the boss arena. Gear up and fly straight up to start the boss fight.
Nyxara boss fight (capture the flag). The fight is a capture-the-zone battle:
- Capture the flag/zone. Standing in the captured zone makes you briefly invincible and lets you pour damage into Nyxara. (Solo bonus: if your gun isn't Pack-a-Punch Level III yet, you get a free Pack-a-Punch here.)
- Reset between windows. When the zone expires, an Oni spawns carrying the next flag — kill it, take the flag, recapture the zone, and resume damaging Nyxara.
- Repeat until she's dead. The pattern stays the same throughout, so it's a fairly forgiving boss once you have the rhythm. Defeating her frees Takeo and Carver's souls, secures the World Seed, and plays the ending cutscene.
Quest Rewards
- "Purified" Takeo Operator Skin
- Two Calling Cards (Kowakujō Completion + a Main Quest variant for finishing before Directed Mode releases)
- 10,000 XP
Side Easter Eggs
Free Ray Gun — Obstacle Course (Par Course)
A standalone parkour Easter egg that hands you a free Ray Gun, a nod to the obstacle-course gag from World at War's campaign.
- Prereqs: Pack-a-Punch open and most of the map accessible (around Round 9+).
- Start: at the Training Area (Melee Macchiato), look north to the lava ocean. A floating rock appears — jump onto it to teleport to a burned-down building in the lava.
- The run (40-second timer): rock jumps → wall-jumps off rising walls → sinking floorboards (checkpoints if you fail) → a final stretch following the wooden objects, avoiding the pillars.
- Reward: 4 lion statues rise and give a free Ray Gun plus the Par Course Calling Card.
Takeo Side Easter Egg
Play as Takeo, throw a Psych Grenade at yourself, then walk toward the Takeo reflection that appears. It drops a sword — interact with the sword to begin the side quest. The payoff: you get to kill Takeo's brother.
Carrot Hunt (Takeshi's Castle)
Collect 5 carrots around the map (themed after the Takeshi's Castle game show, tied to a paper horse) to unlock a secret reward. Carrot locations:
- Stables — in the bucket.
- Under the green fruit — grab the carrot tucked beneath it.
- Workshop ramp — in the basket.
- Near Quick Revive (Outer Ward) — at the carrot basket spawn.
- Flower Garden — by the red flowers, in front of the fissure.
"Evencry" Secret Song
Interact with three Mr. Peeks headphones — at the Stables, the Kitchen, and the Onsen Baths — to play "Evencry" by Kevin Sherwood, Malukah & Cole Rolland.
Map Features
Power-Up Statues
Seven shootable statues drop their matching Power-Up; two more (Fire Sale, Random Perk) appear after the first 7 are activated:
- Double Points — the large cherry blossom tree in Central Courtyard
- Nuke — in the lava, east of Melee Macchiato (Training Area)
- Full Power — roof of the sunken house outside Flower Garden
- The remaining statues are scattered around the courtyards and outer paths.
Perk-a-Cola Locations
Der Wunderfizz appears after you buy 4 Perk-a-Colas or reach Round 20.
| Perk | Location |
|---|---|
| Quick Revive | Outer Ward |
| Speed Cola | Gatehouse |
| Death Perception | Stables |
| Melee Macchiato | Training Area |
| Wisp Tea | Flower Garden |
| Double Tap Root Beer | Kitchen |
| Juggernog | Central Courtyard |
| PhD Flopper | Storage Rooms |
| Mule Kick | Tenshu Entrance |
| Elemental Pop | Onsen Baths |
| Vulture Aid | Workshop |
Relics & Cursed Mode
Six Relics unlock through play as Cursed Mode modifiers, in three groups — Grim, Sinister, Wicked — filling the Cursed Tier bar by a third, two-thirds, and full:
- Tier I — Golden Armor (45,000 Essence)
- Tier II — Ultra Rarity (8,000 Salvage, or 17,500 from default rarity)
- Tier III — Pack-a-Punch Level IV (100,000 Essence)
The two Grim Relics unlock by starting in Cursed Mode, the two Sinister at Cursed Tier I, and the two Wicked at Cursed Tier II.
Other Map Features
- Armor vests — Tea Garden
- Upgradable traps — repeated use upgrades them with Fireworks and Cryo variants.
- Ghost guard — spawns behind the Flower Garden traps and gives a murder-case clue (see Set 4).
If you're working through the wider Dark Aether story, also check the Totenreich Easter Egg Guide and the Astra Malorum Easter Egg Guide.
Last updated June 28, 2026 — Kowakujō main quest fully solved and rewritten from my own completed run: the murder-case structure (5 evidence sets → paintings → the murder-board solve), the clock/flags step, the Oni mini-boss, and the Nyxara capture-the-flag boss fight and ending, plus the free Ray Gun obstacle course and my full video walkthrough.